As designers, when you are asked to create graphics or edit photos for a project what questions do you ask?
There are many design considerations that jump to mind:
What message needs to be conveyed?
What’s the color scheme?
Is there a predefined style book to follow or corporate standards for fonts and colors?
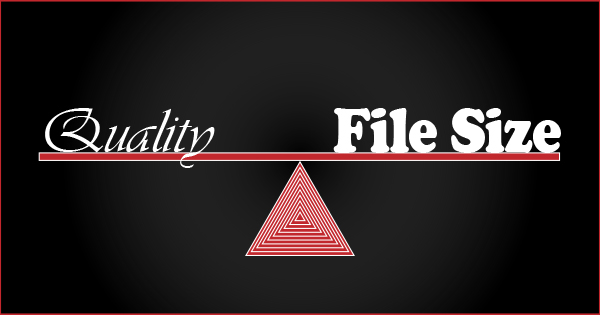
There are so many creative questions to ask to meet and match the needs and branding of a project or client, but as they say the devil can be in the details. The details that should be near the top of the list is how is each asset going to be used, and what is the biggest the size each asset needs to be.
Raster Images
Raster images, which are pixel-based images, like photos, scale down well, but scaling them up can impact image quality. There are some artificial intelligence driven software products that can do some impressive work enlarging pixel images, but it’s still a process of interpolation and estimation to create the new extra pixels, it’s better to try to create the original image at the size needed or bigger.
Vector Image
Now, vector images can be resized without impacting image quality, but sometimes the final destination(s) of the asset will require creating raster version(s) of the asset, like saving a copy of a .SVG or Adobe Illustrator file (.AI) as a .JPG. In this case, you’ll want to know the size to make each version.
File Size
The other dimension of size, particularly important for images heading to the web, is file size in kilobytes, megabytes, or gigabytes, because that size will impact the speed in which an asset will download to a browser. I’m sure we’ve all visited sites where images and videos were incredibly slow to render in our browsers.
Example
Here’s an example, say you are posting something on your own blog and what to include a feature image, and that image is going to be a photo you took while on vacation. I have a photo I took of the Boston skyline, its RAW image from the camera was 6000 pixels by 4000 pixels and was a 23 MB file. I brought it into Photoshop to edit it and when I saved a JPG copy it was JPG 12.3 MB at 6000 x 4000, but why would I want to put an image 6000 pixel wide on a web page when even a hi-def monitor usually tops out at 1920 x 1080, and many people are still using monitors that are 1200 x 1080 or even less. I know it’s a lot of numbers, but let’s make it simple, I’d be happy with an image that is 600 pixels wide, so I’ll reduce the image to 600 x 400 and save it as a high quality JPG, that’s only 10% or 1/10 the size of the full size JPG, but my new file is only JPG 244 KB 600 x 400, not 1.2 MB, that’s 98% reduction in file size. Now, when saving a jpg you can choose the quality from 1 -12, 12 being the highest quality. If I save the image as a JPG with a quality of 10, I get a file size of JPG 141 KB 600 x 400, and at 8 and get JPG 101 KB 600 x 400, which is less than 1% the size of the full size jpg.
Here are all three 600 x 400 JPGs, can you see a difference?


Now, if I was sending this to print, then I’d only crop the image to the size I want and wouldn’t worry about how many megabytes the file was.
How About Video?
This same type of example works for video too. We shoot video, today’s cameras can shoot video as high definition (HD) at 1280 x 720, full high definition (FHD) at 1920 x 1080, 4k at 3840 x 2160, and even 8k at 7680 x 4320, but editing software can render your videos to custom sizes too. If you are creating an eLearning module in Storyline or Captivate and plan to embed it into the project, check the size or resolution of your project, I’d bet it’s smaller than HD. With video files it’s easy to jump from file sizes of megabytes to gigabytes very quickly, so properly sizing your video shouldn’t be overlooked, and just like JPGs, you can also render videos at different qualities to find the perfect balance between files size and video image quality, and also like JPGs, a little reduction in quality can be a big savings in file size.
What Size Do You Need?
Well, if it’s your own project and you’re not being given specs, then here’s one simple-ish method.
Have you ever noticed the “Print Screen” button on your keyboard? Have you ever used it? I use it to figure out graphic sizes for the web all the time. The “Print Screen” button will copy your screen into memory and you can paste the image into any photo editing software, even MS Paint. Now, you can go to your website, pull up your blog, “print screen”, paste that image into your photo editing software, now you’ll be seeing your website in the software, then using the selection tool – make a selection that you determine to be the right size to place an image into, and crop the image of your website down to that selected area. At this point, either your software should be able to show you the dimensions of the cropped image, and that’s the size you want. If your software doesn’t show this, save the image, navigate to the folder with the image file in it, and your OS should have a way to show you the dimensions, on a PC it would be right-click on the file, click “Properties”, and then click the “Details” tab.
What issues have you found balancing quality and file size? What other file or format issues would you suggest new designers explore?
